For some time I have needed software for generating electronic schematics for posting here as well as for my work pursuits. In a nutshell, I wanted something that was free and that preferably would run in a LINUX environment. After a bit of looking online, I found the gEDA toolkit. gEDA stands for GPL'd Electronic Design Automation tools. gEDA is a suite of tools for schematic capture and PCB layout. It takes a bit of getting used to, and I personally find it a bit cumbersome to use, but it IS free and works.
On my Ubuntu 11 system, I tried to use apt-get install form the command line, but ended up having problems when the End User License Agreement box came up. Apparently there are some fonts that need to be installed which don't fall under the normal GNU license. The box to click "OK", as in "I Accept", didn't render properly on the command line; I had to abort the installation and use the graphical "Synaptic Package Manager" tool. When I used the Synaptic Package Manager all went Ok and I had gEDA installed in about 5 minutes.
In order to draw a schematic, you need to use the "gschem" tool. Readers who install gEDA may have a menu icon to start "gschem". I used the command line to invoke "gschem" due to continuing issues with the "Unity desktop" on my Ubuntu 11 system.
Some pointers to get you started:
When gschem starts, you are confronted by a black background. If you are like me, you will want to switch to a white "paper" with colored symbols, lines, ...
Do this by going to the "view" menu and selecting "Light color scheme". NOTE: Any time you close gschem, the background will default to the dark color scheme the next time you start gschem - even if you saved your file with a light background. So when you re-open your file, don't freak out if the 'paper' is dark, just go to 'view' menu and reset it.
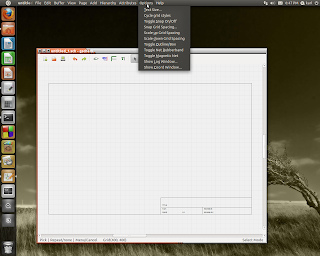
Under the 'Options' menu, you can change the grid spacing, text size, and other environment behaviors. See the photo above.
You will definitely want to make sure that the 'Toggle Snap on/off' control is set to "off" - otherwise you will go insane trying to place components accurately as they jump around.
If your mouse has a wheel, zooming in or out will be much easier. As you edit your drawing, you will be zooming in or out regularly.
The best way I found to learn gschem is to try out the various menu selections and functions.
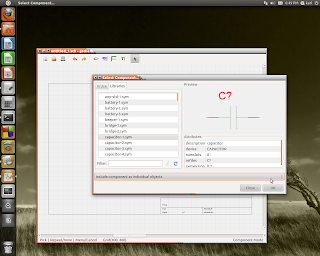
When selecting a component from the component menu, make sure you select the "Include component as indivdual objects" option. This allows you to change labels, change the default pin numbering on op amps, ... See the second photo.

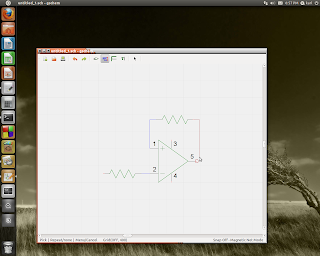
The third photo shows the wiring tool in use. To run a wire, left-hand click on whatever point you want to start. If you are maneuvering around other components, left-click whenever you are changing directions. As you approach another wire or connector, a little red ball will appear. Simply left-click on that to complete the connection. When you complete a connection, left click, then right click with your mouse to 'detach' - otherwise you will have lines zig-zagging from that point all over your drawing.

To SAVE your drawing, go to the file menu and select the 'save' option.
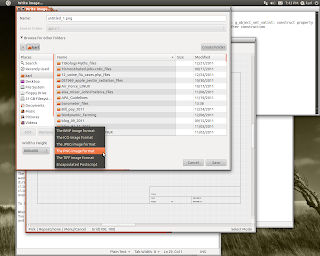
When you are finished and want to publish the drawing, select 'Write Image' under the 'file' menu. You will have a few choices as to file format and resolution. Set those parameters to what you want and save. You should now have a schematic that can be read in any image viewer or browser.


No comments:
Post a Comment
Constructive comments are welcome! Spam, or any abusive or profane comments will be deleted.